DIY Four-Leafed Clover Shamrock Felt Pin
Learn how to make this sweet, simple four-leaf clover shamrock pin to rock around town on St. Patrick’s (St. Patty’s) Day!
I feel a little silly running around town on Saint Patrick’s Day; all decked out in a green dress or top. I know some people rock fedoras and feather boas, but I think that happens a little later than I tend to be out these days!

DIY Four-Leafed Clover Shamrock Felt Pin
I guess I feel like I’m too old to wear green so as not to get pinched. But I like the whole holiday and that jazz, and I want to do something festive. So today, I busted out my felt collection and embroidery floss and made myself a sweet, simple shamrock (or four-leaf clover) pin to rock around town come March 17!

Supplies Needed for Four-Leafed Clover Shamrock Felt Pin

- Green felt
in 2 shades
- Green embroidery floss
/needle
- Thick paper
(cardstock
works well)
- Pen
/marker
/pencil
- Scissors

How to Make Four-Leafed Clover Shamrock Felt Pin

Grab a piece of thicker paper and draw a row of scallops. Try to make them all the same size, between 3/4 inch – 1 inch wide.

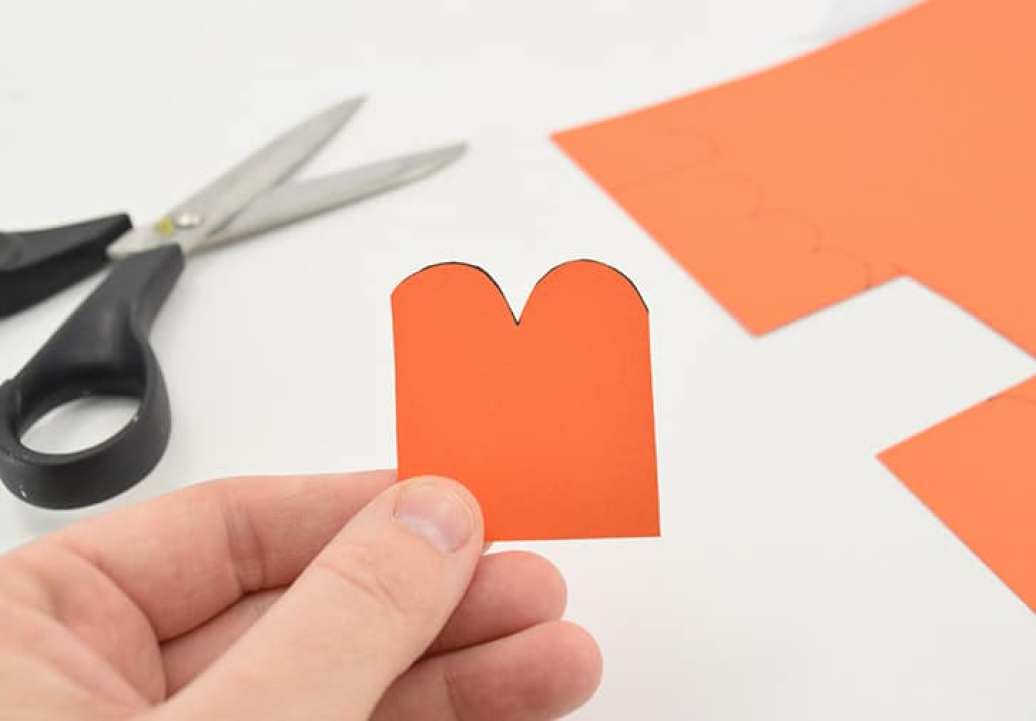
Take your two best scallops side by side and trim them into a shape like the one above. Perfection is not necessary. See how my pattern is slightly fuller on the right than on the left? No big deal. This is going to be the pattern for our clover leaves.

Here’s a quick tip… a little bit of adhesive on the back of the pattern will help you keep it in place when cutting out the felt. You can also pin the pattern onto the felt, but then you run into the problem of it kind of dimpling, and it’s a mess I’d rather avoid these days. My favorite to use is Aleene’s Tacky Sheets. Trim a small piece away from the larger sheet. Peel the backing from one side and stick to the pattern. Pull away the remaining protective backing and stick it to a shirt, your finger, or something else a few times to lessen the stickiness. This stuff is excellent, and we need only a temporary stick.

Trim around your pattern with scissors sharp enough to cleanly cut the felt.

Trace your first pattern onto the cardstock. Duplicate the shape but make it smaller inside the pattern tracing. Trim and you have your pattern for your inner, smaller leaves. Trim those pieces out of a different shade of green for a nice contrast.

Take one larger and one smaller leaf and place it together with the bottoms flush. Fold in the middle, as you see above.

Pinch the sides to meet with the bend along the middle.

Using a sharp needle, run a few strands of embroidery floss through the leaf, going through the bends and folds you created, tacking them in place.

Repeat for all of the leaves. It does not matter that they are all done the same. If a leaf faces a different direction, you must remove and resew it.

Start to pull the string, and the shamrock shape will start to take hold.

Turn your shamrock over and connect the end leaves with a quick stitch.

Pulling the thread tightly keeps the shape as symmetrical as possible.

Create a few stitches on the backside to hold the shamrock together.

Use the remaining thread to attach a bar pin to the backside of the shamrock, and you’ll make a sweet little brooch!

This is a seriously inexpensive project that will keep you in the green!


13 Comments on “DIY Four-Leafed Clover Shamrock Felt Pin”
I like it, but I’d like it even more if it were a Shamrock instead of a 4-leaf-clover.
Pingback: Shamrock Treats Crafts and Decor to Celebrate St. Patrick's Day - Outnumbered 3 to 1
Pingback: 17 festive craft ideas to get your family and home ready for St. Patrick’s Day
Pingback: 17 festive craft ideas to get your family and home ready for St. Patrick’s Day | FrankoPolo
Pingback: 17 festive craft ideas to get your family and home ready for St. Patrick’s Day – News and Entertainment
Wow. I love that idea. Totally simple and doable for those with basic stitching skills and such classy results. I am going to make these with my kids this year. Thanks for the tutorial.
There are things you really don’t need ALLISON!!!
This is a four leaf clover. A shamrock has three leaves!
These are super cute, but a heads up: the four leaf clover isn’t a shamrock. The shamrock (as in the symbol of Ireland) has only three leaves. The four leaf clover isn’t a st pat’s symbol.
This pin is really cute, but it is not a shamrock. It is a four-leaf clover, which has nothing whatsoever to do with St. Patrick’s Day. The shamrock has huge significance in Ireland because of St Patrick.
a really cute project! Thanks!
From my understanding, 3-leaf clovers are called shamrocks, but the 4-leaf clovers are the lucky ones and not referred to as shamrocks! Weird factoid tidbit of info! Love the pin, making it next week!